Recently, I’ve been using Notion for a variety of purposes, including tracking my workouts. While there are many fitness tracking templates available, some of which are quite complex, I chose to rely on existing popular apps like Hevy, Strava, and Concept2 Logbook for detailed tracking, and use Notion as a central place for logging my activities.
Initially, I was tracking my workouts manually, which wasn’t very enjoyable. In this post, I’ll provide a brief overview of my fitness tracker and explain how I used Zapier to automatically sync my workouts from Hevy. If you’re less interested in how I did it and more interested in just using Hevy with Zapier, scroll to the end of this post. Now, let’s dig in!
My Notion Fitness Tracker
I tried several of the many fitness tracker templates available, but I wasn’t quite satisfied with them. Instead, I decided to create my own using a very simple database with fields to track the metrics I’m interested in and templates for the different activities I do.
Notion has many views of the databases you create, one of which is the calendar view. I love this view because it really shows an “unbroken chain” that is so useful for making a habit stick.

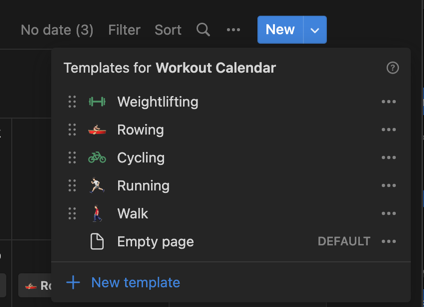
Like I said earlier, the power here is that this process is simple. I just click new, select the activity and set the date and it’s recorded. That is fine, but automating this from my various applications would be sublime and save me time of swapping between apps.
Integrating with Hevy
As previously mentioned, I use Hevy to track my workouts. It offers a great free plan as well as a really great Pro version. Typically, these kinds of applications have an API, but unfortunately, I could not find any published API documentation. After searching /r/hevy, I discovered someone had reverse-engineered the private API and even created a GitHub repository documenting it. Although not perfect, it was good enough to get me started!
Creating a Private Integration on Zapier
Unfortunately, as of this writing, Hevy does not have an integration available on Zapier. However, do not despair! Zapier’s Developer Platform is perfect for integrating with any API on your own. You can use this for personal use, share it with others, or even work with the API provider to make the app live. Since this integration uses an unofficial API, it will likely never be more than a shared private integration.
To get started, create an account or log in to Zapier, visit the developer dashboard, and start a new integration.

Fill all the basic information about the application, upload a logo and answer the questions and start building.
Authentication
Reading the request and response for logging in, it appears that a /login endpoint takes a POST of json containing a username and password and returns an auth-token key that is used for successive requests. This is known as Session based authentication and thankfully is supported on Zapier, so we choose that authentication type and continue on to configure the details for it.

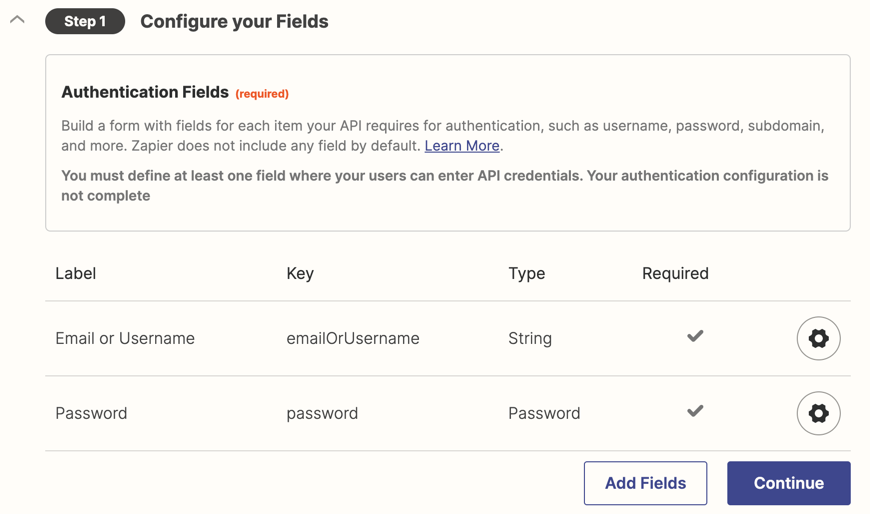
I then create two user provided fields to match up with the username/password combination in the request example, providing both human friendly names and map them to names used in the request.
For the next step of handling the session token request, Hevy’s API has a custom mechanism for returning the session token that is different from most session auth based APIs, so we’ll have to click “Switch to Code Mode” in step two to add a little custom code to parse the session token out of the response.
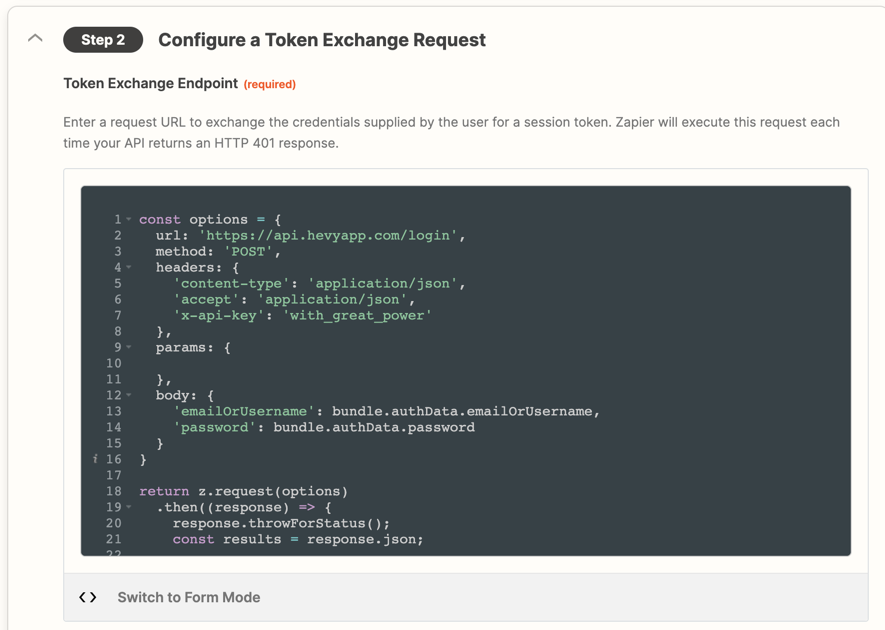
Most of this is filled out already as a template, only needing some minor changes under the comment about custom parsing.
return z.request(options).then((response) => {
  response.throwForStatus();
  const results = response.json;
  // You can do any parsing you need for results here before returning them

  return {
    sessionKey: results.auth_token,
  };
});
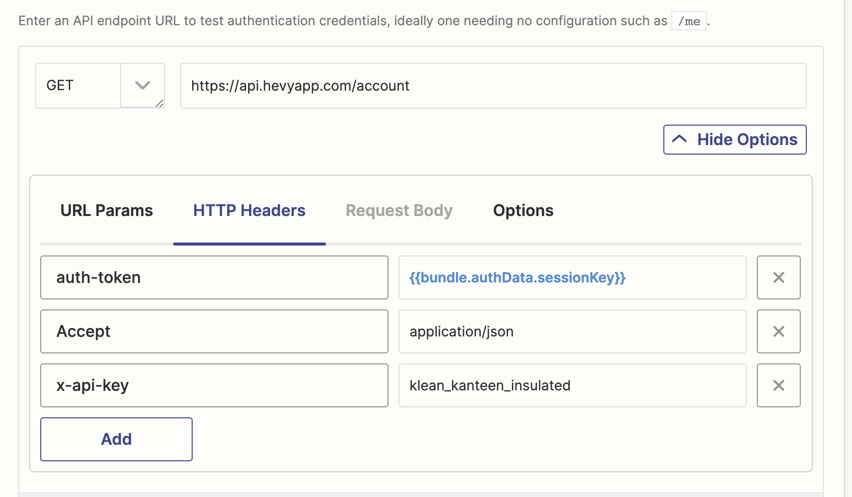
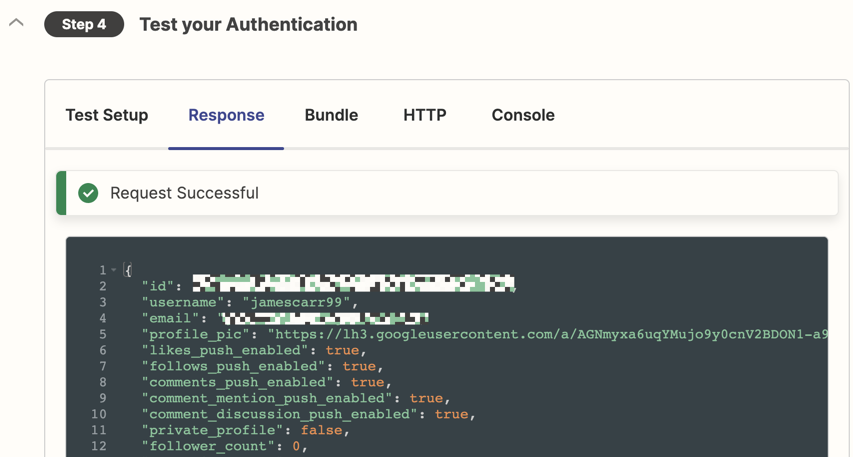
The next thing we need to implement is some kind of test API call that is made to verify the connection credentials are correct. An endpoint that is read only is most ideal, and a common call for this kind of test is to request the user profile. The account endpoint on Hevy’s API is perfect for this.
Finally comes the moment of truth, connecting the API and testing that it all works. Of course for this blog post, I had everything working before I started writing but the reality is I spent a good thirty minutes of trial and error figuring out what I had wrong. What is nice is that the test auth method will capture stack traces, responses and console.log calls to help you debug what is going south.

After a lot of back forth, finally the sweet taste of success! We can now successfully connect to Hevy on Zapier!
Creating a Trigger
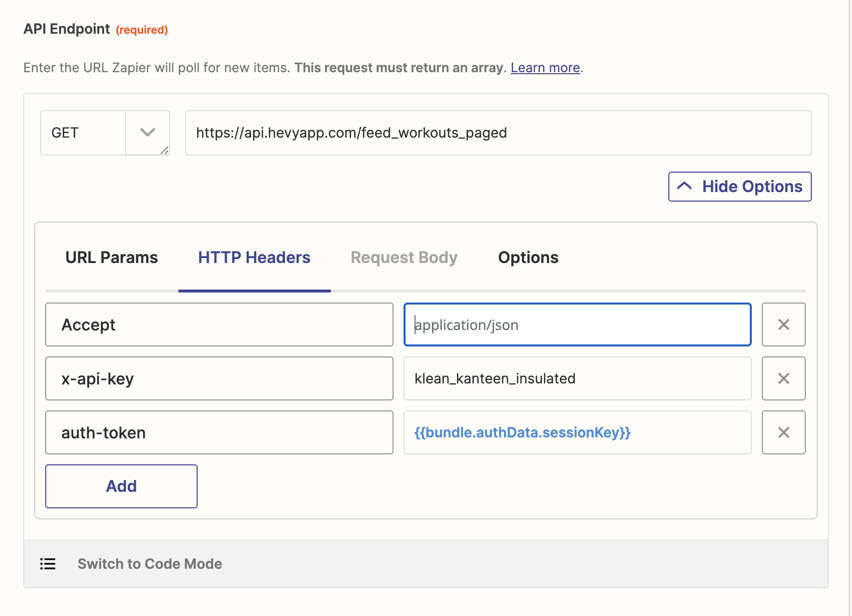
Creating a trigger is a matter of defining the endpoint, http method and the headers to make when making a request.
With that all setup, we select our saved authentication and test the trigger. Uh-oh! Looks like we have a problem.
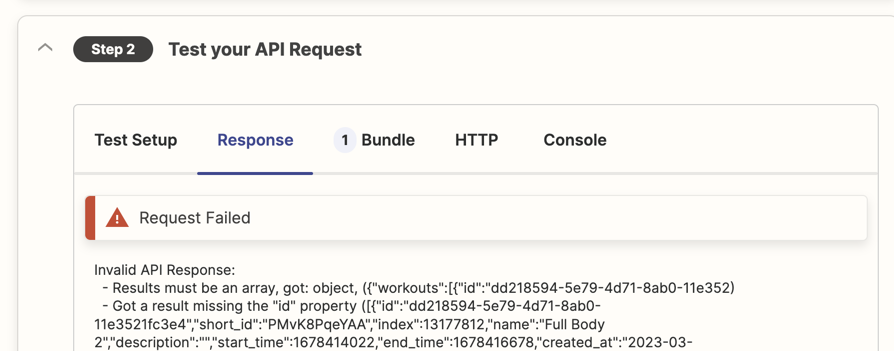
In this case, the API call returns an object that has a list as one of the properties while zapier polling triggers expect a list. No worries though, we just swap to code view for the API endpoint and add some custom logic to return the list.
const options = {
  url: 'https://api.hevyapp.com/feed_workouts_paged',
  method: 'GET',
  headers: {
    Accept: 'application/json',
    'x-api-key': 'klean_kanteen_insulated',
    'auth-token': bundle.authData.sessionKey,
  },
  params: {},
};

return z.request(options).then((response) => {
  response.throwForStatus();
  const results = response.json;

  // You can do any parsing you need for results here before returning them

  return results.workouts;
});
Save it and rerun the trigger test.
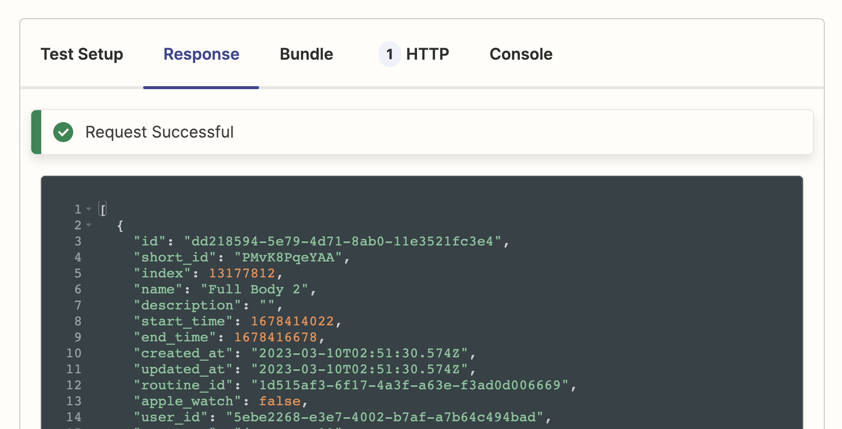
Hooray! Works like a charm. Looking over the response body though, it is a bit complex! There’s a lot going on here, and there’s a list of the workouts I performed that include the workout name, weight, sets, reps and even photos of the routine. This isn’t going to be easy to pull out and include in a zap so I make the decision to write some custom logic to iterate through these details and populate them in a new field in the response.
Custom Property For Exercises
As we scroll through the exercises listed in the workout, we can see they have a lot of rich data!

Scanning through this, the properties that are of interest are:
- title
- thumbnail_url
- sets
- reps
- weight
Since this is going to require a bit of logic, I copy and past the response object and work locally until I have a function that parses what i want.
function render_markdown(workout) {
let content = '';
workout.exercises.forEach((exercise) => {
content +=
`### ${exercise.title}\n` +
`\n\n` +
'| Reps | Weights|\n' +
'|------|--------|\n';
exercise.sets.forEach((set) => {
content += `|${set.reps}|${set.weight_kg.toFixed(2)}kg|\n`;
});
content += '\n\n';
});
return content;
}
return z.request(options).then((response) => {
response.throwForStatus();
const results = response.json;
// You can do any parsing you need for results here before returning them
return results.workouts.map((workout) => {
workout.markdown_content = render_markdown(workout);
return workout;
});
});
I then execute a test and verify all works well, scrolling down to verify the presence of a markdown_content attribute.
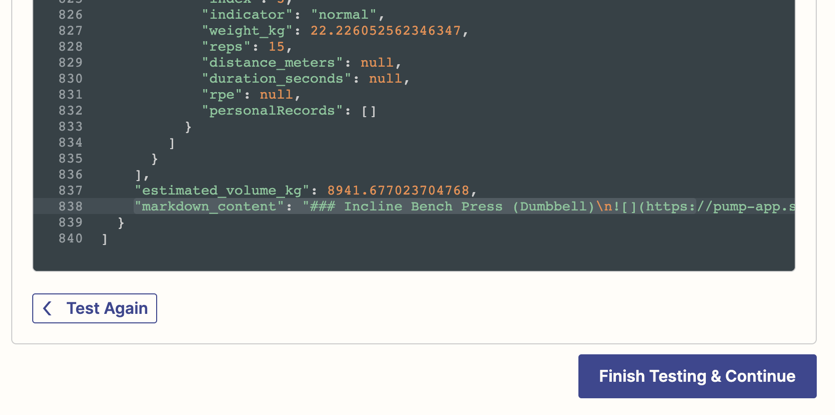
Success! While there are other API endpoints, this is all I need so it is time to set a Zap up to start syncing my workouts.
Syncing to Notion
The power of adding Hevy to Zapier via the developer platform is now I can integrate it with any application on Zapier, of which Notion is one of many. So I create a new Zap and Hevy is now available in the drop down list, with the trigger “New Workout”.

I go through the usual steps by adding my Hevy email address and password and testing to retrieve a workout. All successful, so now time to add Notion.
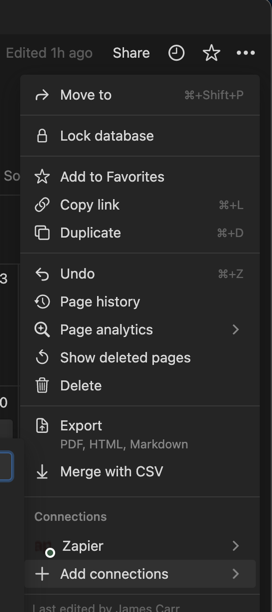
I select Notion from the app dropdown and select “Create Database Item.” At first my “Workout Calendar” doesn’t show up in the database drop down, this is because I need to give Zapier access from within Notion. This can be done by navigating to my workout tracking database page in Notion, clicking on the three dots at the top, and clicking + Connections in the drop down to add Zapier.
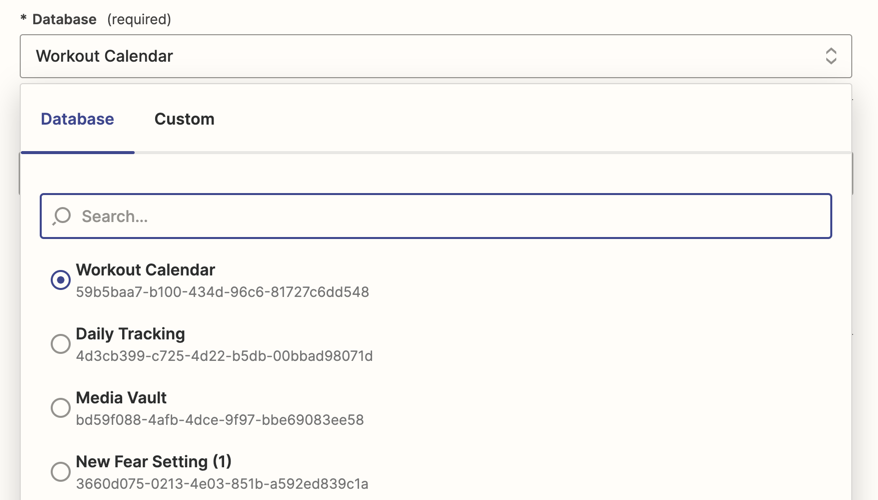
With that done, I go back and reload and select “Workout Calendar” from the database dropdown.
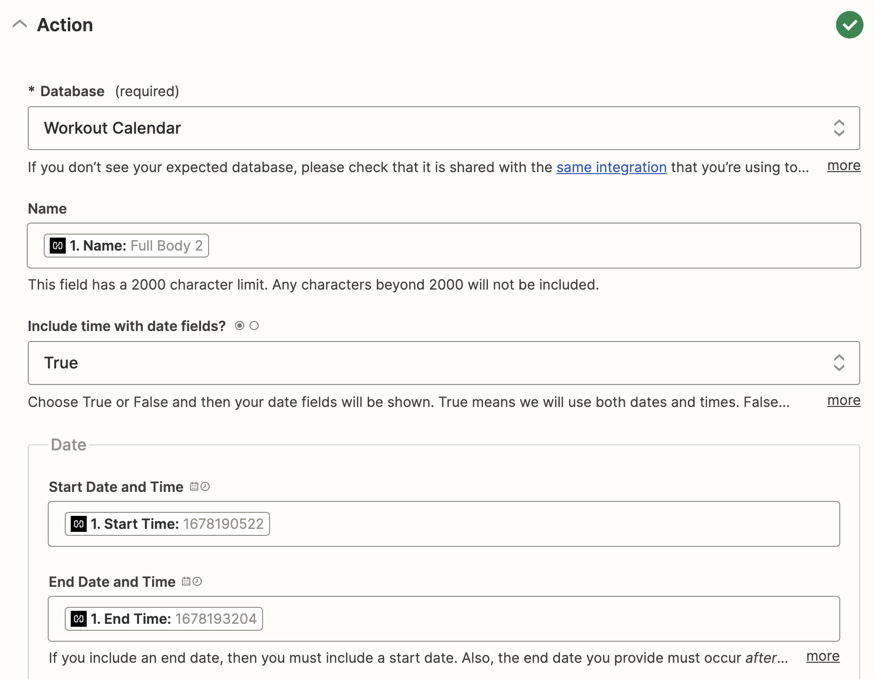
I can then map properties from Hevy to Notion.
And for the content section, we can use our special Markdown Content property and select the Content Format as “Markdown.”
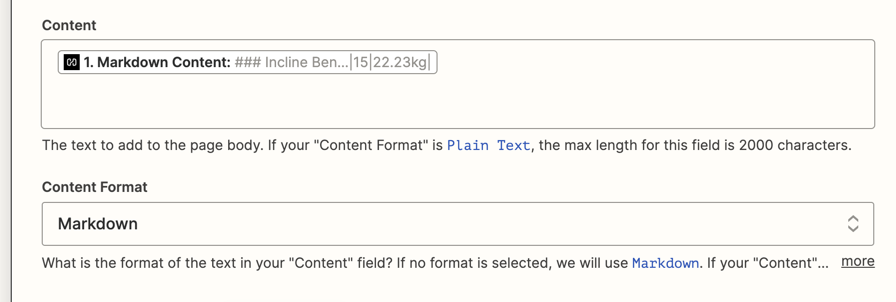
Sadly as of this writing, it looks like the Notion API that is integration on Zapier doesn’t support markdown. That means the only option for now is to use plaintext and write into support about the issue. I have my own Notion integration that I’m working on and will update this post when it is ready for sharing (or the official one is fixed).
Testing It All Out
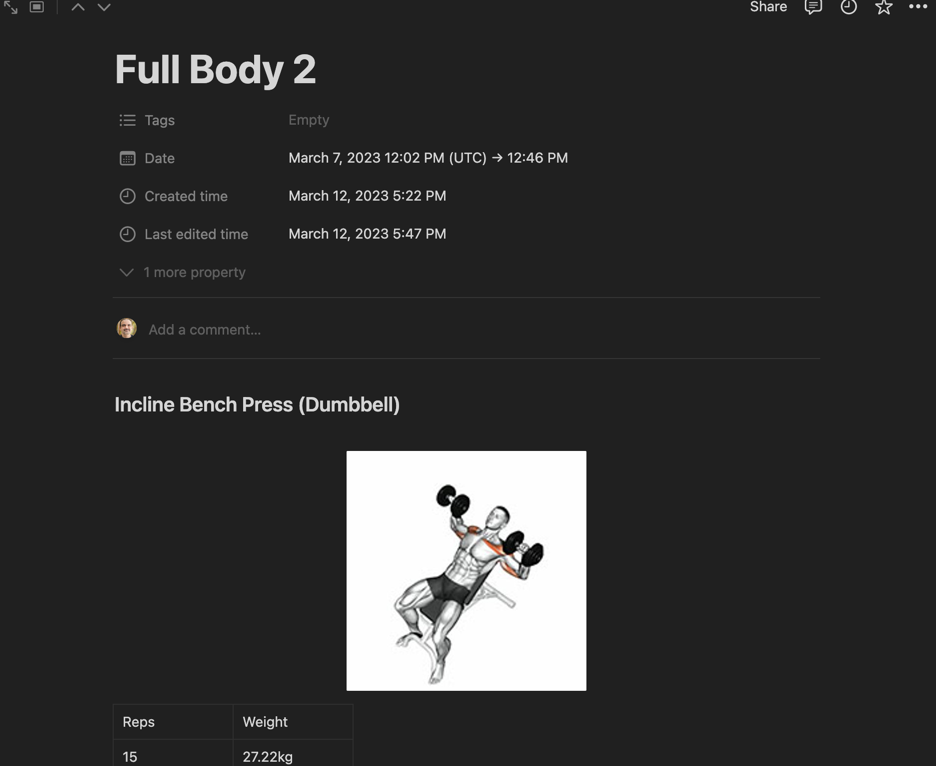
With everything setup, I click test action a voila! The workout now appears on my calendar! Turn the zap on and now it will automatically sync whenever I complete a workout in Hevy!
Try It!
Are you a user of Hevy and interested in using Zapier to sync your workouts to other systems? Feel free to use my shared integration here and give me feedback!